Sunday, June 17, 2012

Fashion... and Camping?


So this past weekend I went camping with my best friend. And being me I love looking fashionable anywhere I go. You never know who you are going to see, and it just makes me more comfortable. So today I am going to give you tips on how to stay cute and fashionable while camping. Which really isn't hard. First we will start with the hair. For long or short hair, braids. braids, braids, and more braid, cute and easy. also when you take them out you have wavy hair. Luckily my friend has short hair, so here are two styles for long and short hair.


So i mainly kept my hair in a braided ponytail, which made doing things so easy!!! and when i took it out it was wavy. 


 so to achieve this look pull your hair into a high ponytail. then brain the remaining hair. Cute and easy.


Now for those of you with shorter hair braids are also fun.


So here is what i did with my friends hair. I parted her hair in half then in half again. I french braided the two braids back into a mid high ponytail. And same thing with this, when you take it out cute waves.

________________________________________________________________________________


Now I know what you are thinking. Fashion and camping. Believe me it is totally do-able. I promise. I tend to go for more of a sporty fashion when camping. which to me is still cute. Go for shorts, tanks, even make your own shirts, i will have a few up cycling tshirt tutorials coming your way soon. plain and simple fashion is good. that and scarfs. small accessories.

heres what I wore.


I took an old tshirt and cut off the collar and made the arm holes bigger, made it more airy. kinda like a basketball shirt.


I also opted for some shorts and knee highs. great for camping and looking super cool!


Or you could go the route of a tshirt and jean shorts. We arent going for runway fashion,, but still cute.


Finally a tank top and shorts. if its really hot out a tank is perfect, also gives you a better tan than a tshirt!

________________________________________________________________________________

Now for bathing suits. What to wear and what to avoid. Period, not just for camping.

*If you have lighter skin stay away from white, light orange, and light yellow, they blend into your skin. and arent flattering.
*Instead try for blues, turquoise, greens and purples. They will make your skin seem darker than it is, or go for patterns! those are in now and they have some many cute designs.


For darker skin try wearing lighter colors, they enhance your natural tan skin.  Also if your going for super cute, try a sarong. I fell in love with these this past summer, you feel femine, sexy and like a model!! i also wore this as a scarf. Its so versatile.


Well thats all, I hope this summer you guys can get out and go camping, I know I will be going again! Have fun Happy Summer!
..."For whether we are white or copper skinned
We need to sing with all the voices of the mountains
We need to paint with all the colors of the wind..."

<3 Jordan

Tuesday, June 12, 2012

DIY... Gingerbread house?

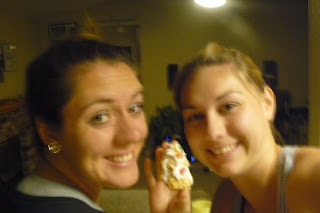
So for a Christmas present I was given 2 gingerbread houses, one is gingerbread and the other is rice crispy treats, and i was so excited to make it. But plans changed and time and time again I did not get to make my Gingerbread house. Finally my best friend came over and we made, and it was horrible. The taste that is I thought it looks super cute. But the marsh mellows were definitely stale, and the candies were yuck, but we had SO much fun making it.


TADA!!! Well it was quite and adventure. So much fun and goo dmomeries, I highly recommend making one, they always end it laughter.

...NO!!!! Not the gumdrop buttons...
<3 Jordan

Monday, June 11, 2012

50's flare... A makeup tutorial

Alright so I have been looking through latest makeup trends, and a lot of designers have been using the 50's cat eye. which I love. I love wings, especially for smaller eyes this enhances them drawing the eyes up making your eyes look not only sexier but bigger! Awesome right? So today I am going to show you how to achieve this simple look. Its just a thick wing on your upper eye lid.


My tutorial is more like the second picture, but feel free to spice it up with some colors!


 I started my putting rever-upper on by bare essentials. It helps hold the makeup. you can also use a primer if you please.


Next I used silver lining by Bare essentials to cover my whole lid. I made it darker on the bottom and lighter towards my eye brown


next i took black leather by bare essentials and i mixed a little bit of water with the powder to create a consistent paste. i used a fin tipped brush to do the eye liner.


draw a line all the way across the edge of your eye extending it out past the outside by a little bit.


draw your lines, i prefer to do this because it is easier to fix. draw the line from the corner of your eye halfway to your eyebrow then connect these lines to the middle of your eye.


fill this in and touch up areas your might have messed up. I finished my eyes off with volume mascara by bare essentials.


Repeat this on your other eye, then you are done such a simple and sexy look!! this looks good with nude or light pink lips. keep it simple like they did in the 50s!!


Hope you liked this. It was my first makeup tutorial and I really liked it! I may do more. I like anything from a simple eye to on the town shadowed eye, to a natural look. Today I was feeling simple. Happy Mondays my loves!!!

“Imperfection is beauty, madness is genius and it's better to be absolutely ridiculous than absolutely boring.” 
<3 Jordan

Sunday, June 10, 2012

Just another day in Paradise... Belated Fashion Friday

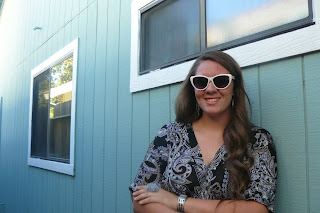
Gosh so I know I'm really bad at doing these dang things on time, and I could say I forgot (which I did) I could say I got lazy (which I did) or I could say that I just have other things on my mind (which I do), So instead I will apologize and continue to try better. Anyways... Lately I have been really into the 50's stuff, like pinups, cat eyes, all that jazz. So I put together a small Fashion Forward outfit. Please pardon the photography I'm really not good at doing it myself. And my sisters seemed to be too busy to assist me, so I concurred this via solo. So I only got top shots. But all I was wearing was jeans and my sandals, nothing fancy, because today I was not feeling fancy. I was feeling laid back cute. Which this shirt is. I found it as a cover up from Kmart and hated how it was like a tent. So i stitch up the front and made a cute shirt. Which I love.


What Im wearing:
Shirt ~ Kmart
Bracelets ~ Premier Designs
Rings ~ Forever 21
Glasses ~ Forever 21
Earrings ~ Premier Designs

Hope you liked it everyone!!! Have a fabulous weekend, and I will see you all Monday. Because I have my first ever makeup tutorial coming out. I promise. I already have it ready to show you!!! EEEP! I hope it looks good. lemme know! And I may do more!

...I can only please one person per day. Today I chose me...
<3 Jordan

Thursday, June 7, 2012

DIY short hair

So into the summer months we travel. now me with my long hair it gets SO hot. its in a ponytail or bun all the time, well here's a way to wear your hair down but up at the same time! This works well with layered hair. I am going to try a different way on my hair since mine is all one layer.

What you will need:
*Hair brush
*hair pins/bobby pins
*hair tie

Btw. please Welcome my Special guest my awesome other sister, Autumn!


Heres the before and after pics!


BEFORE


AFTER

Sorry it's late, but what can you do. hope you liked it! I think I am going to do a DIY Monday. I found this awesome way to color your hair, without dyeing it and I am SO gonna try it. thanks everyone!

...If you want something, do whatever it takes to get it. The easy road is not always the right road...
<3 Jordan

Monday, June 4, 2012

Under the Sea... a nail DIY


Wow its been a long few days.  How was everyone's weekend. Okay so I am in love with ombre nails! So here is another tutorial a lot like "The second star to the Right". That one came to me while thinking about Peter Pan, this one through The Little Mermaid, she is definitely my favorite princess! Now unfortunately since I was little I have bitten my nails, and I was holding strong the past month, but under certain circumstances I bit them all of, so until they grow back, I cannot do any nail DIY. But alas not all is lost! instead I will do something else, most likely make up or a DIY. I haven't decided yet. Let me know what you think? THANKS!


Start with clean nails then paint your whole nail a light blue color. let this dry mostly. It is easier to blend nails when the colors are wet.


Apply your darker color (I chose purple) to the bottom 1/3 of your nail blending it with the blue. This is easiest if the paint is wet and you put only a little bit of the darker color and paint up toward the tip of your nail. This will blend it better.


I then added a little bit of shimmer to the tip of my nails, I want the sparkles to be mainly on the tips as you will see later.


Finally I added the bigger sparkles all over applying them extra thickly to the tips. now cover with a top coat and your done!


...sometimes I imagine as many as 6 impossible things before breakfast...
<3 Jordan